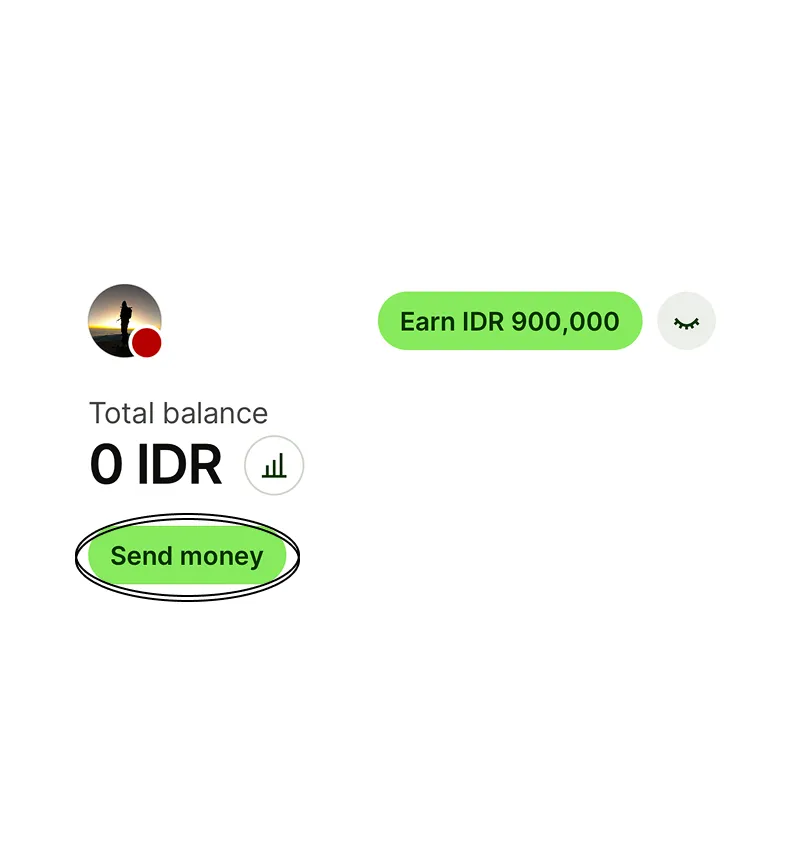
Launch the Wise app on your device. On the home screen, you’ll see a button labeled “Send Money” just below your balance.
Guide to Bank Transfers on the Wise App
Follow the steps below to complete a bank transfer using the Wise app. Make sure to check the screenshots provided for visual guidance at each step.
Step 1: Open the Wise App
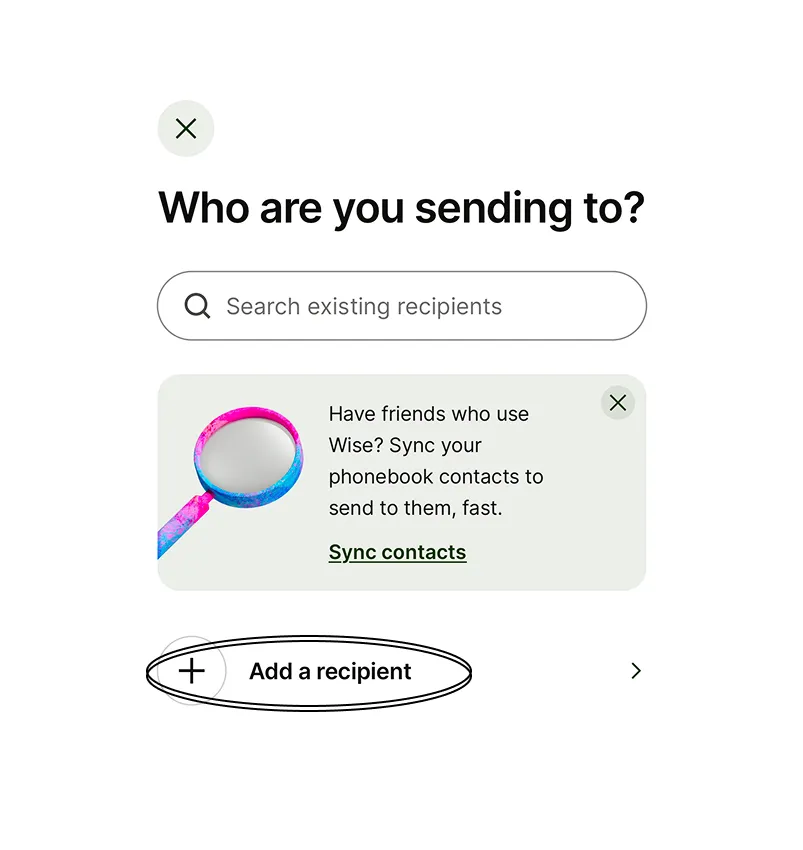
Step 2-1: Add a New Recipient
You’ll be taken to the “Who are you sending to?” page. Tap the “Add a recipient” button.
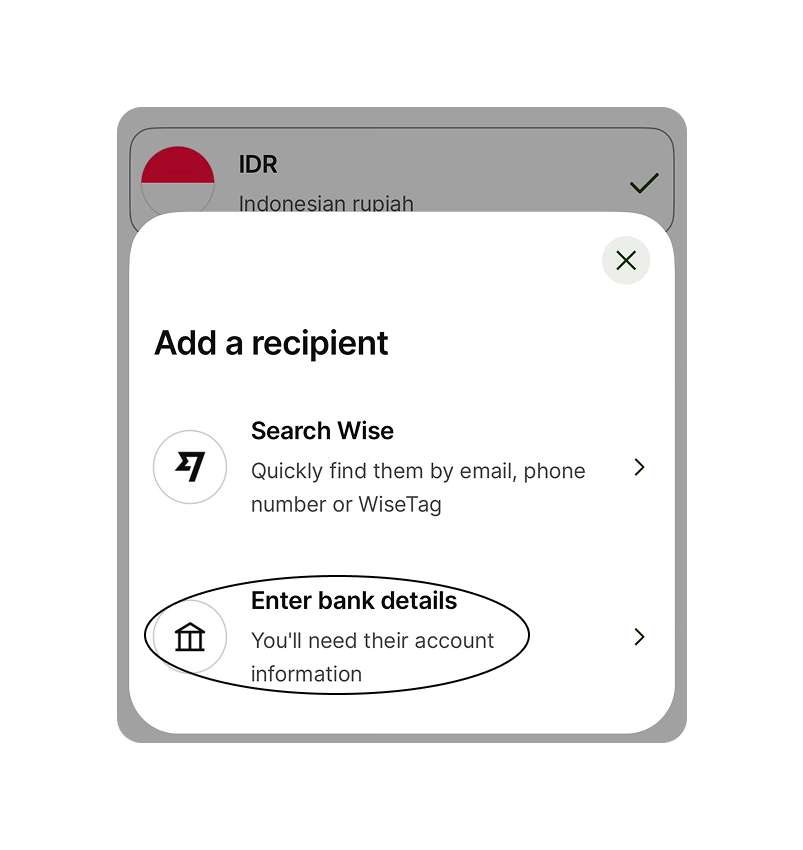
Step 2-2
Next, you will be prompted to select the recipient’s currency. Since you’re sending money to Indonesia, choose Indonesian Rupiah (IDR).
A pop-up menu titled “Add a recipient” will appear. From the available options, select “Enter bank details”.
This is the key step for using the bank transfer method in the Wise app.
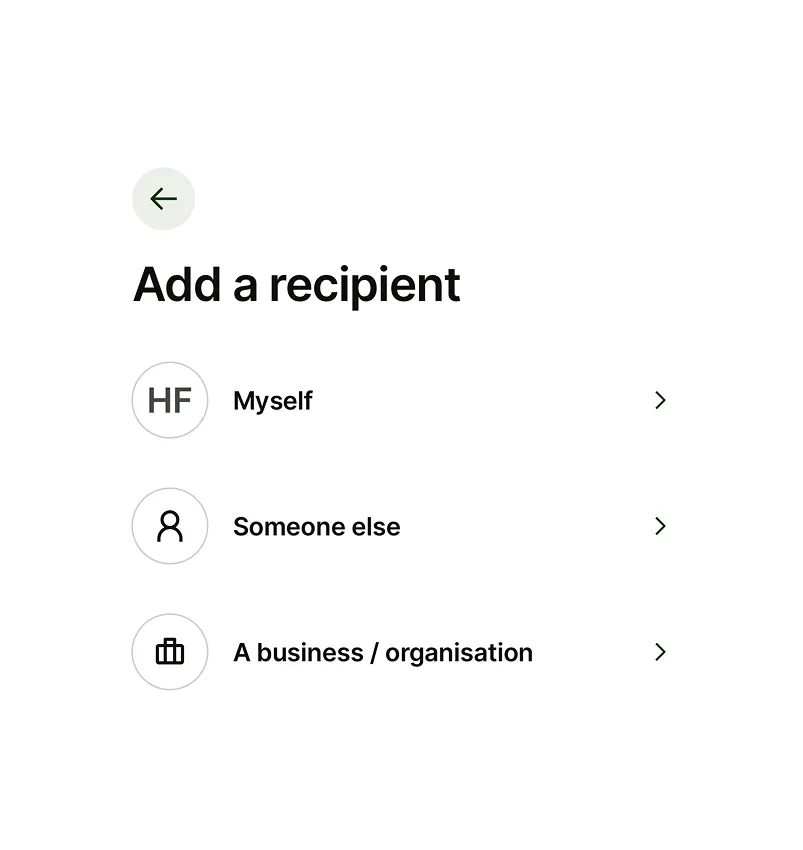
Step 3: Choose Recipient Type
You will now be taken to the “Add a recipient” page.
Select “Someone else” or “A business / organisation” option.
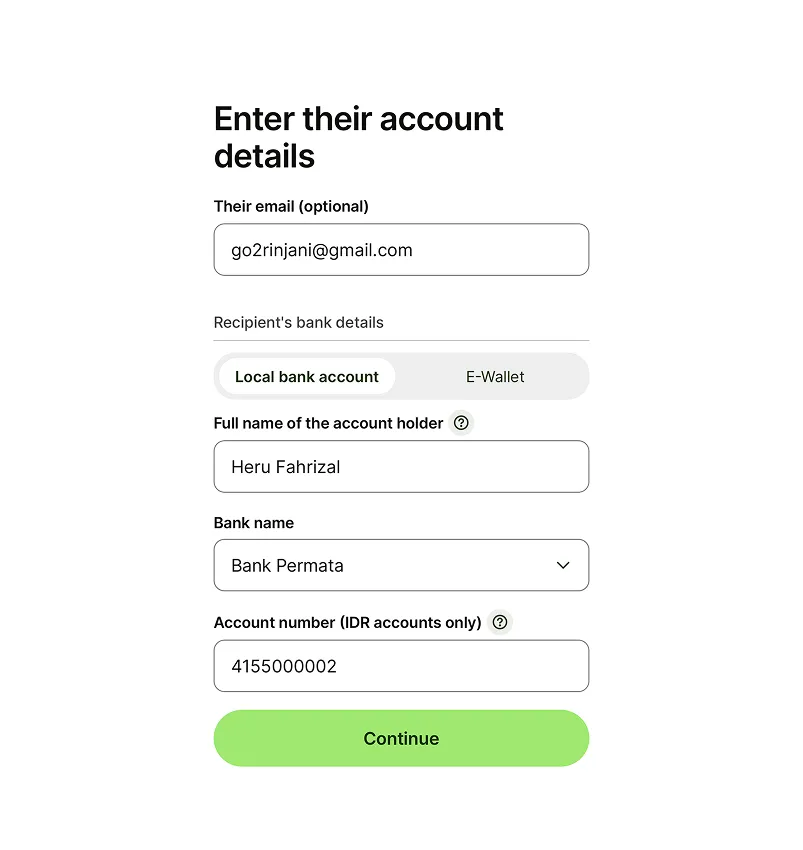
Step 4: Enter Bank Account Details
Next, you’ll arrive at the “Enter their account details” page. Please input the required bank information as provided by us within the image.
✅ Make sure all fields are filled in accurately.
Note: If you previously selected the option “a business / organization” instead of “someone else,” please ensure that the “Name of business / organisation” field is filled in with the exact name of our bank account holder, which is “Heru Fahrizal.” This is to ensure consistency and prevent any mismatch with our bank account details.
Once completed, tap “Continue”.
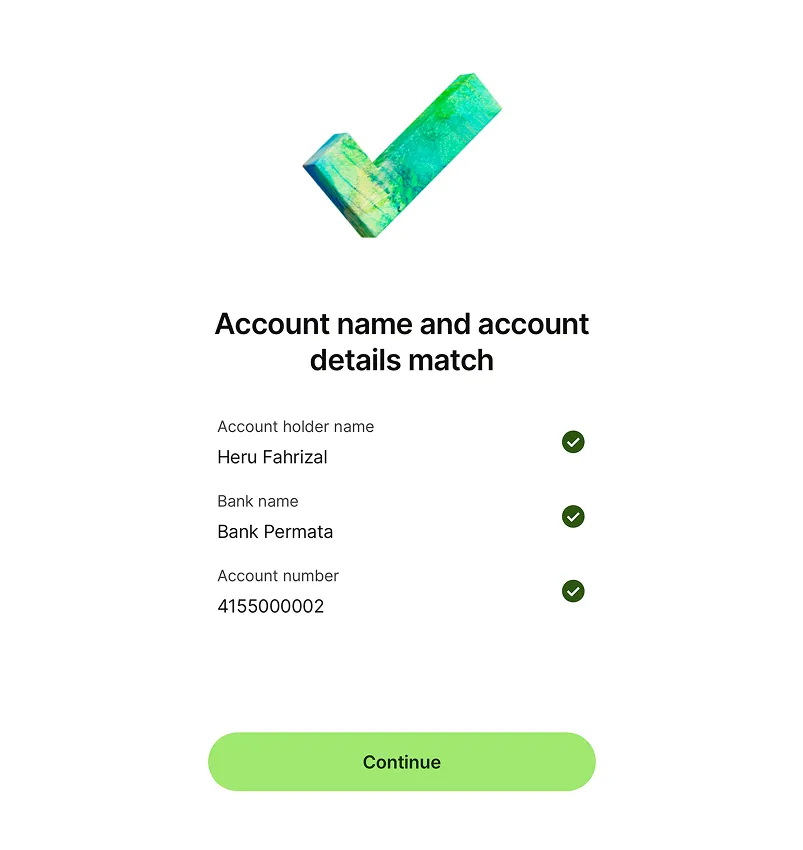
Step 5: Confirm Bank Details
You’ll be directed to a confirmation page showing the recipient’s:
Account holder name
Bank name
Account number
Click “Continue” to proceed.
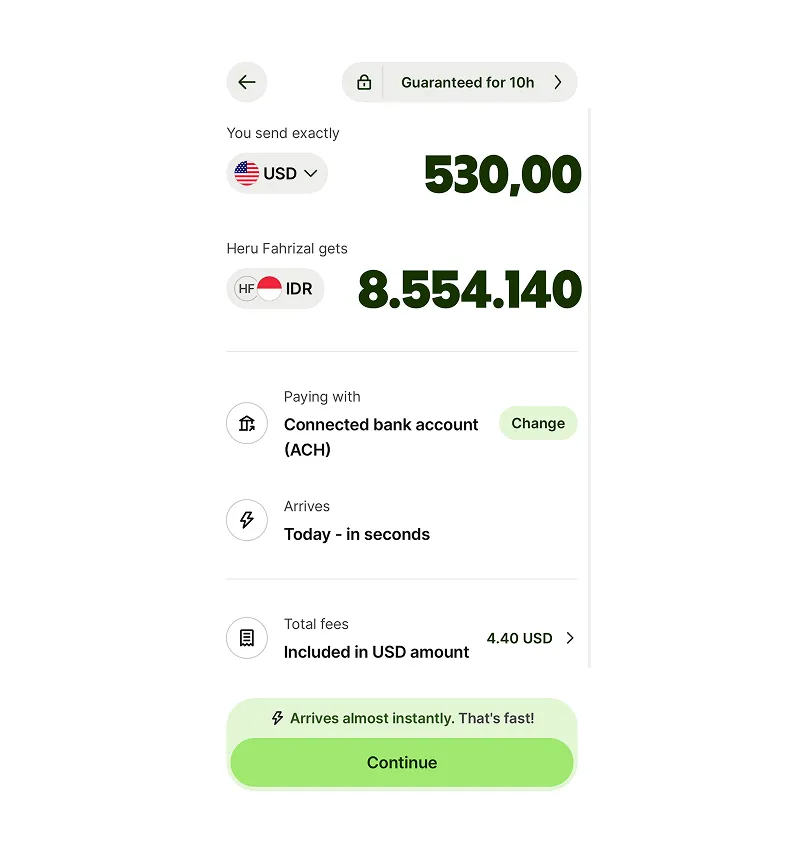
Step 6: Set Transfer Amount
Select your currency and enter the amount you wish to send. Wise will automatically convert the currency into Indonesian Rupiah (IDR).
Adjust as needed, then tap “Continue.”
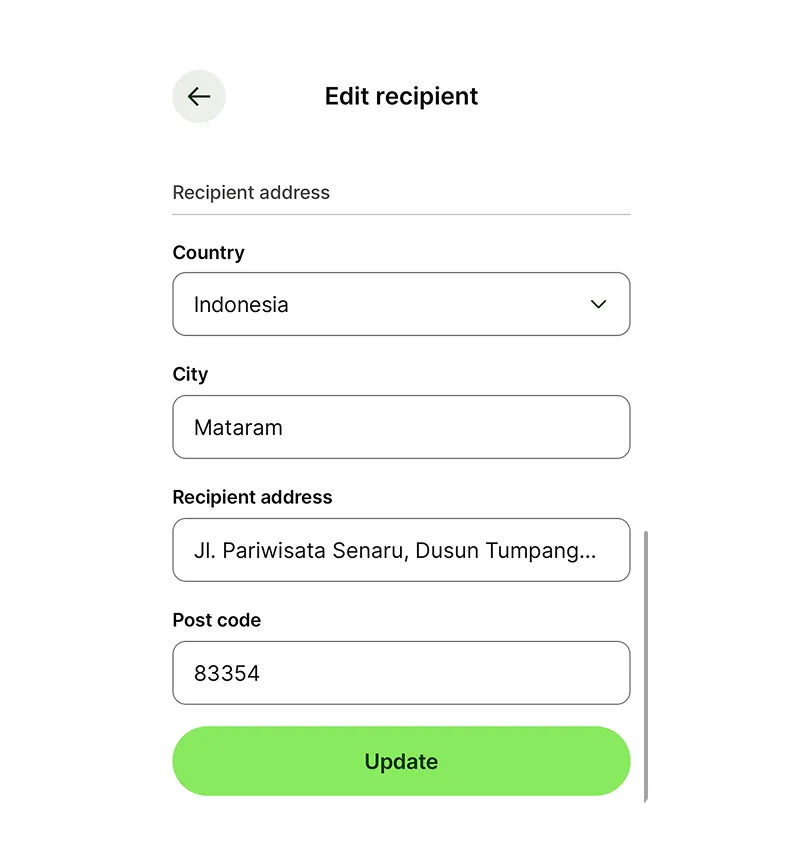
Step 7: Edit Recipient
You’ll now reach the “Edit recipient” page. Enter the details as shown in the image. For the Recipient address, you can use our full address detail here: Jl. Pariwisata Senaru, Dusun Tumpang Sari, Dasan Lendang Gocek, Bayan.
Then tap “Update” once done.
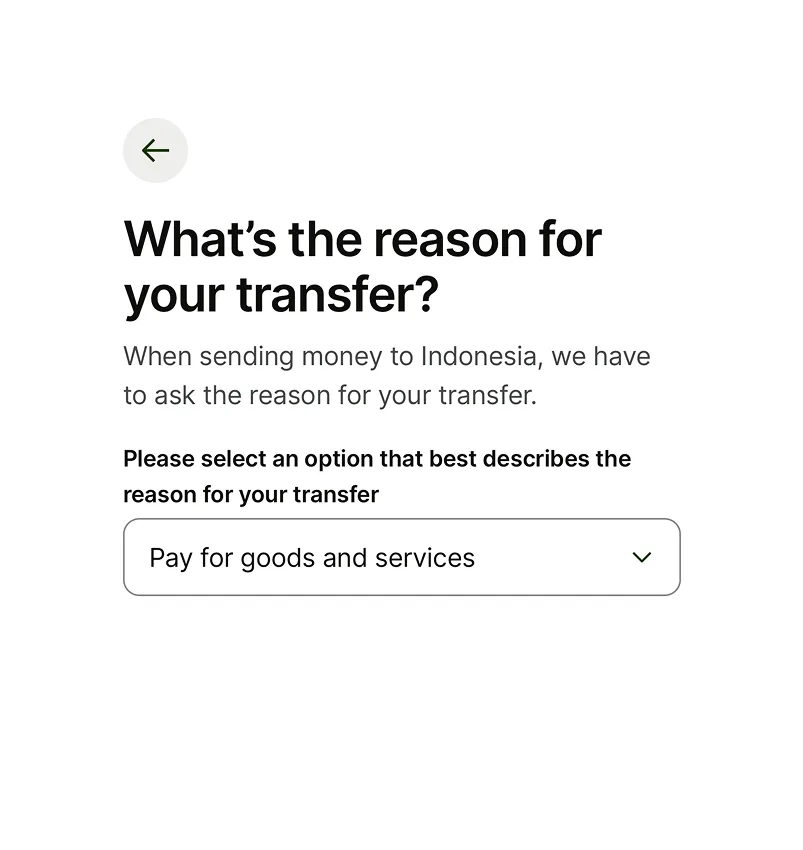
Step 8: Choose the Transfer Reason
On the “What’s the reason for your transfer?” page, choose “Pay for goods and services.”
Tap “Continue.”
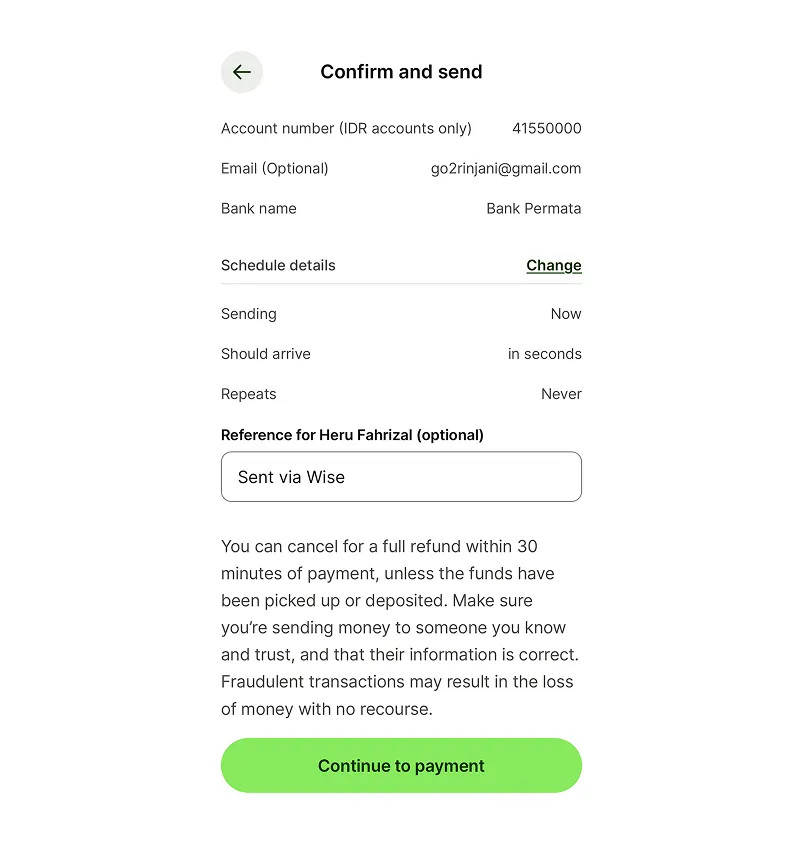
Step 9: Review and Confirm
You’re now at the final step — the “Confirm and send” page.
Review all transfer details carefully. If everything looks correct, click “Continue to payment.” Follow Wise’s instructions to complete the payment.
Final Step: Confirmation
Once your payment is successfully sent, please confirm the transaction with us by sharing your proof of payment.
If you still need help, please don’t hesitate to contact us 🙂 we are more than happy to help you.